
Author
Sahil Kumar
Publihsed On
Dec 16, 2025
Updated On
Dec 16, 2025
Category
Laravel
CRUD Application With Image Upload Using Laravel 8
In this post, I'm going to show you how to build a CRUD (Create, Read, Update, Delete) Application with Image upload and pagination using Bootstrap 5 and Laravel 8. In this tutorial, you'll see how to create a basic CRUD application in which you will learn how to insert records with image upload, how to display all the records with image and pagination, how to edit and update the record with image and how to delete a record.
You just need to follow a few steps and you will get a CRUD Application with Image upload using controller, model, route, bootstrap 5 and blade syntax.
Now just follow all the steps very carefully one by one. don't worry I'll share all the codes here so just copy and paste them into your application.
Step 1: Installing Laravel 8
First, you have to install a fresh Laravel 8 application using composer, for this, you just have to open your terminal and run the below command.
composer create-project laravel/laravel crud-appStep 2: Database Configuration
Now in this step, you have to write your database credentials into the .env file, but first, open your phpMyAdmin and create a new database with the name crud_app Now just see the below codes, if you have set any username or password other than mine then just write your own credentials.
B_CONNECTION=mysql
DB_HOST=localhost
DB_PORT=3306
DB_DATABASE=crud_app
DB_USERNAME=root
DB_PASSWORD=
Step 3: Creating Model, Migration and Controller
In this step, we'll create our Model, migration and controller using a single command.
php artisan make:model Post -mc --resource-m flag is used to create a migration; c flag is used to create a controller and --resource flag is used for creating a controller with some basic CRUD scaffolding methods.
Step 4: Defining Schema
Now in this step, we'll define our posts table schema so for this just open database/migrations/create_posts_table.php and just use the below codes.
<?php

use Illuminate\Database\Migrations\Migration;
use Illuminate\Database\Schema\Blueprint;
use Illuminate\Support\Facades\Schema;

class CreatePostsTable extends Migration {
  /**
   * Run the migrations.
   *
   * @return void
   */
  public function up() {
    Schema::create('posts', function (Blueprint $table) {
      $table->id();
      $table->string('title');
      $table->string('category');
      $table->longText('content');
      $table->string('image');
      $table->timestamps();
    });
  }

  /**
   * Reverse the migrations.
   *
   * @return void
   */
  public function down() {
    Schema::dropIfExists('posts');
  }
}
Now you have to run this migration by the following command:
php artisan migrateStep 5: Creating Routes
Now in this step, We'll create routes for our CRUD application. We'll create a resource route in which all the routes will be present. Just use the below codes.
Route::resource('post', 'App\Http\Controllers\PostController');Now to see all the routes you have to run a command:
php artisan route:list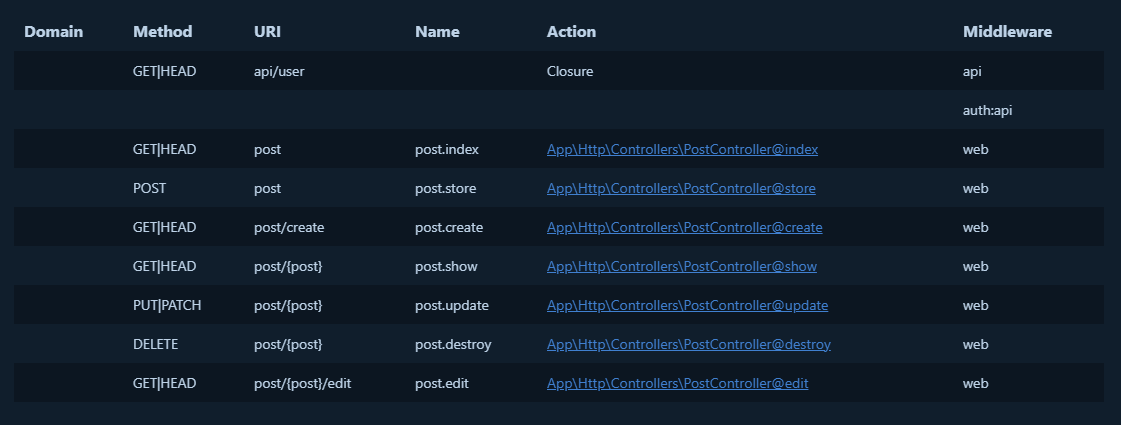
Routes List
Step 6: Working in Model
Now in this step, we'll write some codes in the Post model. So for this just open the app/Models/Post.php file and put the below codes.
<?php

namespace App\Models;

use Illuminate\Database\Eloquent\Factories\HasFactory;
use Illuminate\Database\Eloquent\Model;

class Post extends Model {
  use HasFactory;
  protected $fillable = ['title', 'category', 'content', 'image'];
}
Step 7: Working in Controller
Now, this is the most important step, In this, we'll write all the application logic. So for this just open the app/Http/Controllers/PostController.php file and define each method like the below codes you can copy and paste the below codes.
<?php

namespace App\Http\Controllers;

use App\Models\Post;
use Illuminate\Http\Request;
use Illuminate\Support\Facades\Storage;

class PostController extends Controller {
  /**
   * Display a listing of the resource.
   *
   * @return IlluminateHttpResponse
   */
  public function index() {
    $posts = Post::orderBy('id', 'desc')->paginate(3);
    return view('post.index', ['posts' => $posts]);
  }

  /**
   * Show the form for creating a new resource.
   *
   * @return IlluminateHttpResponse
   */
  public function create() {
    return view('post.create');
  }

  /**
   * Store a newly created resource in storage.
   *
   * @param  IlluminateHttpRequest  $request
   * @return IlluminateHttpResponse
   */
  public function store(Request $request) {
    $request->validate([
      'title' => 'required',
      'category' => 'required',
      'content' => 'required|min:50',
      'file' => 'required|image|mimes:jpeg,png,jpg,gif,svg|max:2048',
    ]);

    $imageName = time() . '.' . $request->file->extension();
    // $request->image->move(public_path('images'), $imageName);
    $request->file->storeAs('public/images', $imageName);

    $postData = ['title' => $request->title, 'category' => $request->category, 'content' => $request->content, 'image' => $imageName];

    Post::create($postData);
    return redirect('/post')->with(['message' => 'Post added successfully!', 'status' => 'success']);
  }

  /**
   * Display the specified resource.
   *
   * @param  AppModelsPost  $post
   * @return IlluminateHttpResponse
   */
  public function show(Post $post) {
    return view('post.show', ['post' => $post]);
  }

  /**
   * Show the form for editing the specified resource.
   *
   * @param  AppModelsPost  $post
   * @return IlluminateHttpResponse
   */
  public function edit(Post $post) {
    return view('post.edit', ['post' => $post]);
  }

  /**
   * Update the specified resource in storage.
   *
   * @param  IlluminateHttpRequest  $request
   * @param  AppModelsPost  $post
   * @return IlluminateHttpResponse
   */
  public function update(Request $request, Post $post) {
    $imageName = '';
    if ($request->hasFile('file')) {
      $imageName = time() . '.' . $request->file->extension();
      $request->file->storeAs('public/images', $imageName);
      if ($post->image) {
        Storage::delete('public/images/' . $post->image);
      }
    } else {
      $imageName = $post->image;
    }

    $postData = ['title' => $request->title, 'category' => $request->category, 'content' => $request->content, 'image' => $imageName];

    $post->update($postData);
    return redirect('/post')->with(['message' => 'Post updated successfully!', 'status' => 'success']);
  }

  /**
   * Remove the specified resource from storage.
   *
   * @param  AppModelsPost  $post
   * @return IlluminateHttpResponse
   */
  public function destroy(Post $post) {
    Storage::delete('public/images/' . $post->image);
    $post->delete();
    return redirect('/post')->with(['message' => 'Post deleted successfully!', 'status' => 'info']);
  }
}
We have stored all the images in the storage directory so to access those images from the public directory we have to run a simple command:
php artisan storage:linkWe are storing all the images in the storage/images directory.
Step 8: Working in Views
In this step, We'll create our views using a blade templating engine. Here we'll use the Bootstrap 5 framework for designing this application. So let's first create a layout file that will be extended by the child views.
Create a new folder in the resources/views directory with name layout and inside the layout, the directory creates a new file with name app.blade.php and just copy the below codes and paste it into your file.
<!DOCTYPE html>
<html lang="en">

<head>
  <meta charset="UTF-8">
  <meta http-equiv="X-UA-Compatible" content="IE=edge">
  <meta name="viewport" content="width=device-width, initial-scale=1.0">
  <title>@yield('title')</title>

  <link rel='stylesheet' href='https://cdnjs.cloudflare.com/ajax/libs/twitter-bootstrap/5.0.2/css/bootstrap.min.css' />
</head>

<body>
  <div class="container">
    <div class="row my-2">
      <div class="col-lg-12 d-flex justify-content-between align-items-center mx-auto">
        <div>
          <h2 class="text-primary">@yield('heading')</h2>
        </div>
        <div>
          <a href="@yield('link')" class="btn btn-primary rounded-pill">@yield('link_text')</a>
        </div>

      </div>
    </div>
    <hr class="my-2">

    @yield('content')

  </div>
  <script src='https://cdnjs.cloudflare.com/ajax/libs/twitter-bootstrap/5.0.2/js/bootstrap.bundle.min.js'></script>
</body>

</html>
Create another directory inside resources/views with name post and inside post directory we'll create four new files:
1. create.blade.php
@extends('layout.app')
@section('title', 'Add New Post')
@section('heading', 'Create a New Post')
@section('link_text', 'Goto All Posts')
@section('link', '/post')

@section('content')

<div class="row my-3">
  <div class="col-lg-8 mx-auto">
    <div class="card shadow">
      <div class="card-header bg-primary">
        <h3 class="text-light fw-bold">Add New Post</h3>
      </div>
      <div class="card-body p-4">
        <form action="/post" method="POST" enctype="multipart/form-data">
          @csrf
          <div class="my-2">
            <input type="text" name="title" id="title" class="form-control @error('title') is-invalid @enderror" placeholder="Title" value="{{ old('title') }}">
            @error('title')
              <div class="invalid-feedback">{{ $message }}</div>
            @enderror
          </div>

          <div class="my-2">
            <input type="text" name="category" id="category" class="form-control @error('category') is-invalid @enderror" placeholder="Category" value="{{ old('category') }}">
            @error('category')
              <div class="invalid-feedback">{{ $message }}</div>
            @enderror
          </div>

          <div class="my-2">
            <input type="file" name="file" id="file" accept="image/*" class="form-control @error('file') is-invalid @enderror">
            @error('file')
              <div class="invalid-feedback">{{ $message }}</div>
            @enderror
          </div>

          <div class="my-2">
            <textarea name="content" id="content" rows="6" class="form-control @error('content') is-invalid @enderror" placeholder="Post Content">{{ old('content') }}</textarea>
            @error('content')
              <div class="invalid-feedback">{{ $message }}</div>
            @enderror
          </div>

          <div class="my-2">
            <input type="submit" value="Add Post" class="btn btn-primary">
          </div>
        </form>
      </div>
    </div>
  </div>
</div>
@endsection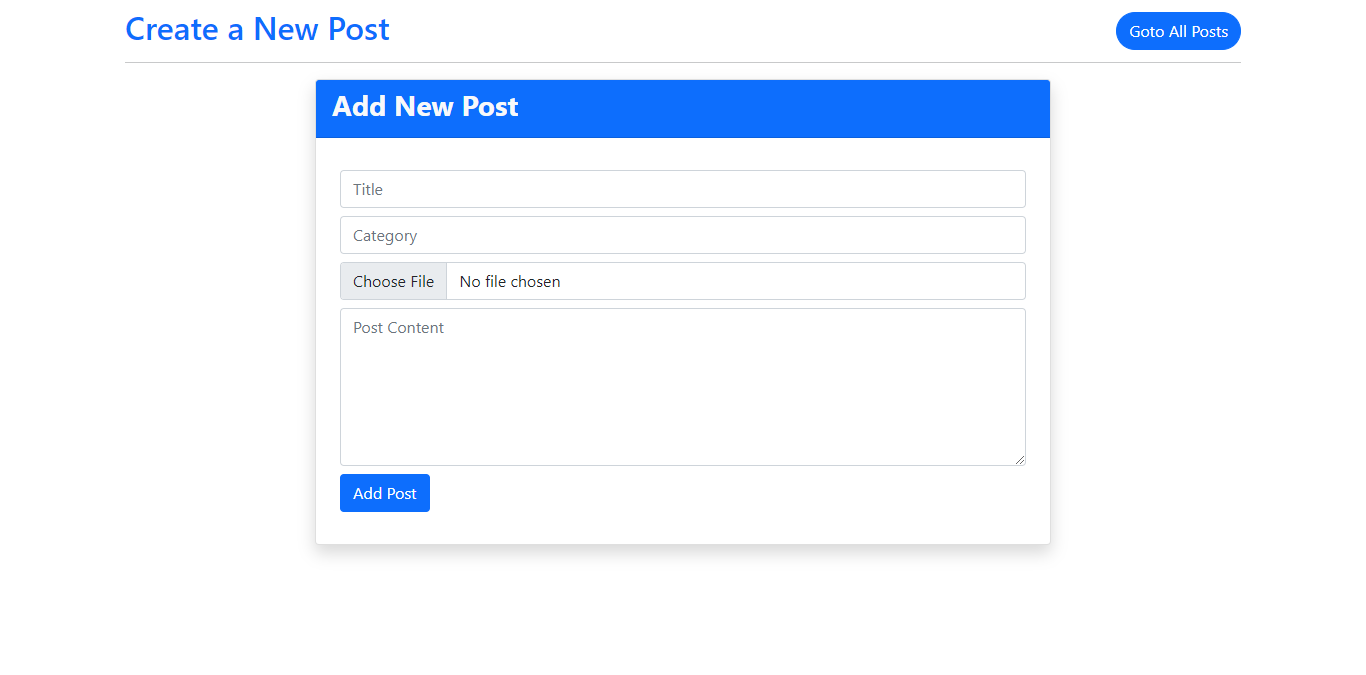
Create Post Page
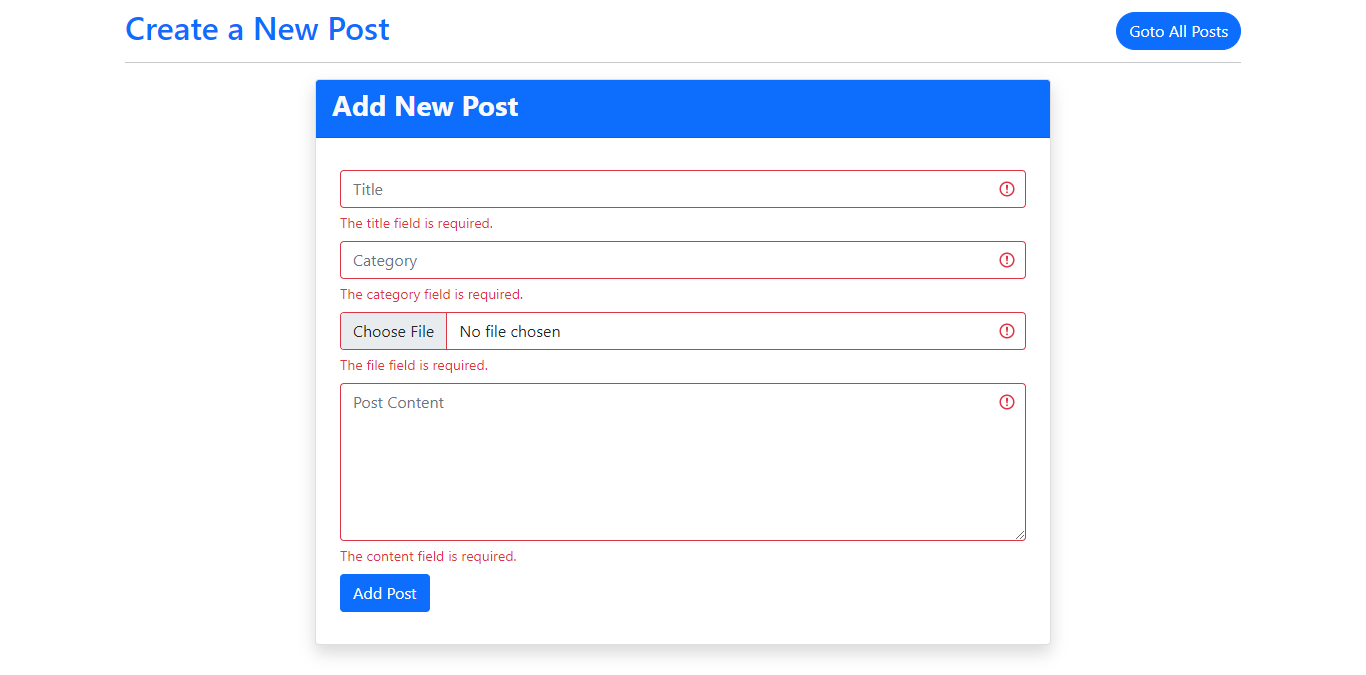
Create Post Page Bootstrap 5 Validation
2. edit.blade.php
@extends('layout.app')
@section('title', 'Edit Post')
@section('heading', 'Edit This Post')
@section('link_text', 'Goto All Posts')
@section('link', '/post')

@section('content')

<div class="row my-3">
  <div class="col-lg-8 mx-auto">
    <div class="card shadow">
      <div class="card-header bg-primary">
        <h3 class="text-light fw-bold">Edit Post</h3>
      </div>
      <div class="card-body p-4">
        <form action="/post/{{ $post->id }}" method="POST" enctype="multipart/form-data">
          @csrf
          @method('PUT')
          <div class="my-2">
            <input type="text" name="title" id="title" class="form-control" placeholder="Title" value="{{ $post->title }}" required>
          </div>

          <div class="my-2">
            <input type="text" name="category" id="category" class="form-control" placeholder="Category" value="{{ $post->category }}" required>
          </div>

          <div class="my-2">
            <input type="file" name="file" id="file" accept="image/*" class="form-control">
          </div>

          <img src="{{ asset('storage/images/'.$post->image) }}" class="img-fluid img-thumbnail" width="150">

          <div class="my-2">
            <textarea name="content" id="content" rows="6" class="form-control" placeholder="Post Content" required>{{ $post->content }}</textarea>
          </div>

          <div class="my-2">
            <input type="submit" value="Update Post" class="btn btn-primary">
          </div>
        </form>
      </div>
    </div>
  </div>
</div>
@endsection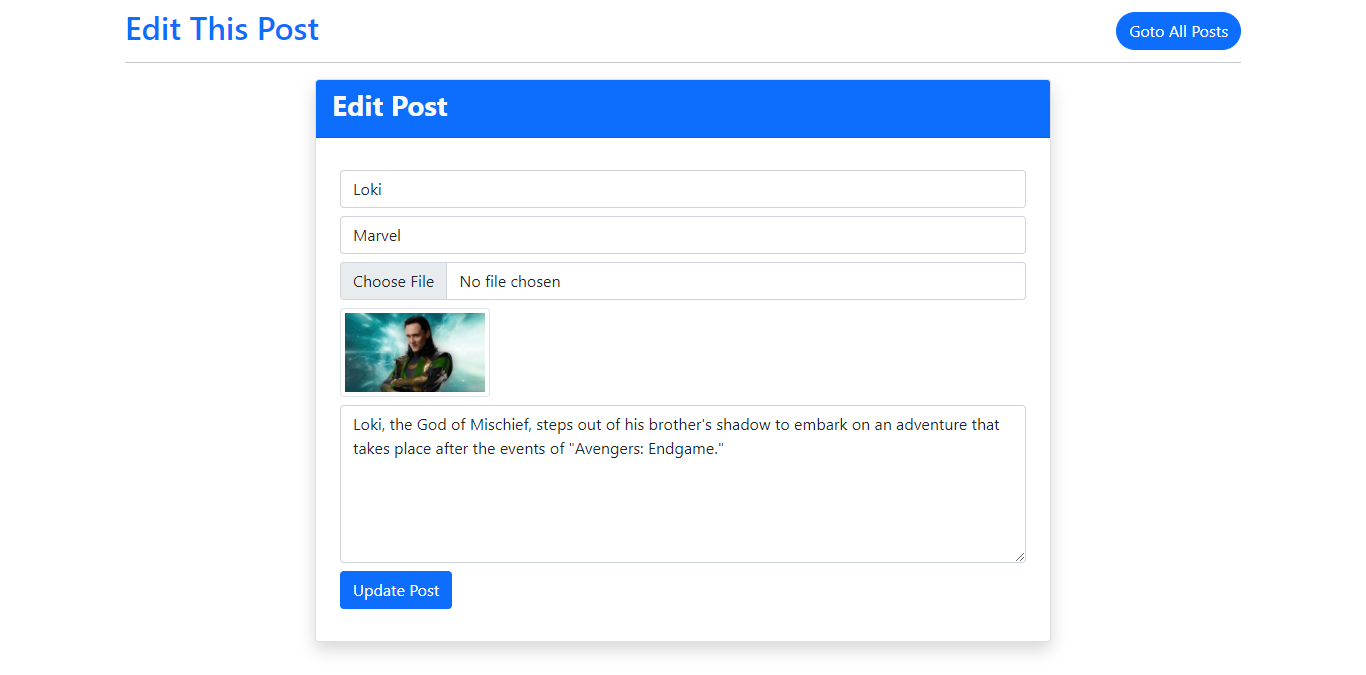
Edit Post Page
3. index.blade.php
@extends('layout.app')
@section('title', 'Home Page')
@section('heading', 'All Posts')
@section('link_text', 'Add New Post')
@section('link', '/post/create')

@section('content')

@if(session('message'))
<div class="alert alert-{{ session('status') }} alert-dismissible fade show" role="alert">
  <strong>{{ session('message') }}</strong>
  <button type="button" class="btn-close" data-bs-dismiss="alert" aria-label="Close"></button>
</div>
@endif
<div class="row g-4 mt-1">
  @forelse($posts as $key => $row)
  <div class="col-lg-4">

      <div class="card shadow">
        <a href="post/{{ $row->id }}">
          <img src="{{ asset('storage/images/'.$row->image) }}" class="card-img-top img-fluid">
        </a>
        <div class="card-body">
          <p class="btn btn-success rounded-pill btn-sm">{{ $row->category }}</p>
          <div class="card-title fw-bold text-primary h4">{{ $row->title }}</div>
          <p class="text-secondary">{{ Str::limit($row->content, 100) }}</p>
        </div>
      </div>

  </div>
  @empty
    <h2 class="text-center text-secondary p-4">No post found in the database!</h2>
  @endforelse
  <div class="d-flex justify-content-center my-5">
    {{ $posts->onEachSide(1)->links() }}
  </div>

</div>

@endsection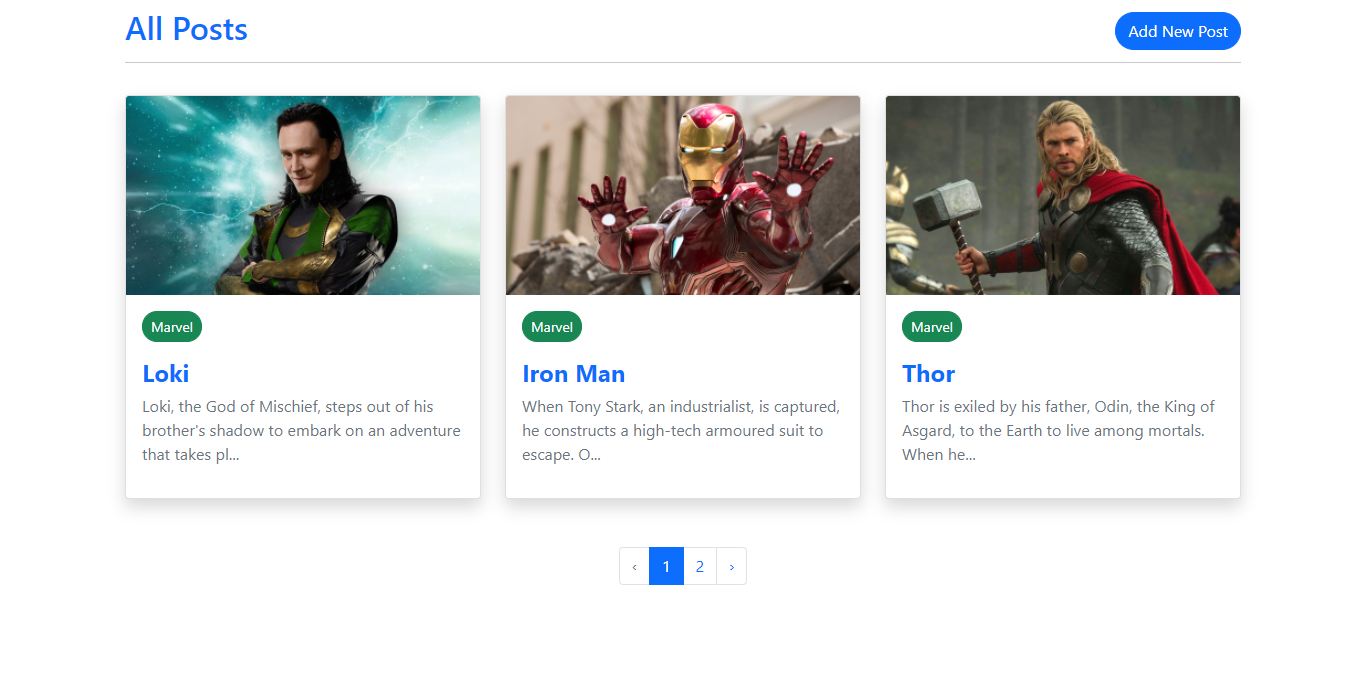
Display All Posts with Pagination
4. show.blade.php
@extends('layout.app')
@section('title', 'Post Details')
@section('heading', 'Post Details')
@section('link_text', 'Goto All Posts')
@section('link', '/post')

@section('content')

<div class="row my-4">
  <div class="col-lg-8 mx-auto">
    <div class="card shadow">
      <img src="{{ asset('storage/images/'.$post->image) }}" class="img-fluid card-img-top">
      <div class="card-body p-5">
        <div class="d-flex justify-content-between align-items-center">
          <p class="btn btn-dark rounded-pill">{{ $post->category }}</p>
          <p class="lead">{{ \Carbon\Carbon::parse($post->created_at)->diffForHumans() }}</p>
        </div>

        <hr>
        <h3 class="fw-bold text-primary">{{ $post->title }}</h3>
        <p>{{ $post->content }}</p>
      </div>
      <div class="card-footer px-5 py-3 d-flex justify-content-end">
        <a href="/post/{{$post->id}}/edit" class="btn btn-success rounded-pill me-2">Edit</a>
        <form action="/post/{{$post->id}}" method="POST">
          @csrf
          @method('DELETE')
          <button type="submit" class="btn btn-danger rounded-pill">Delete</button>
        </form>
      </div>
    </div>
  </div>
</div>
@endsection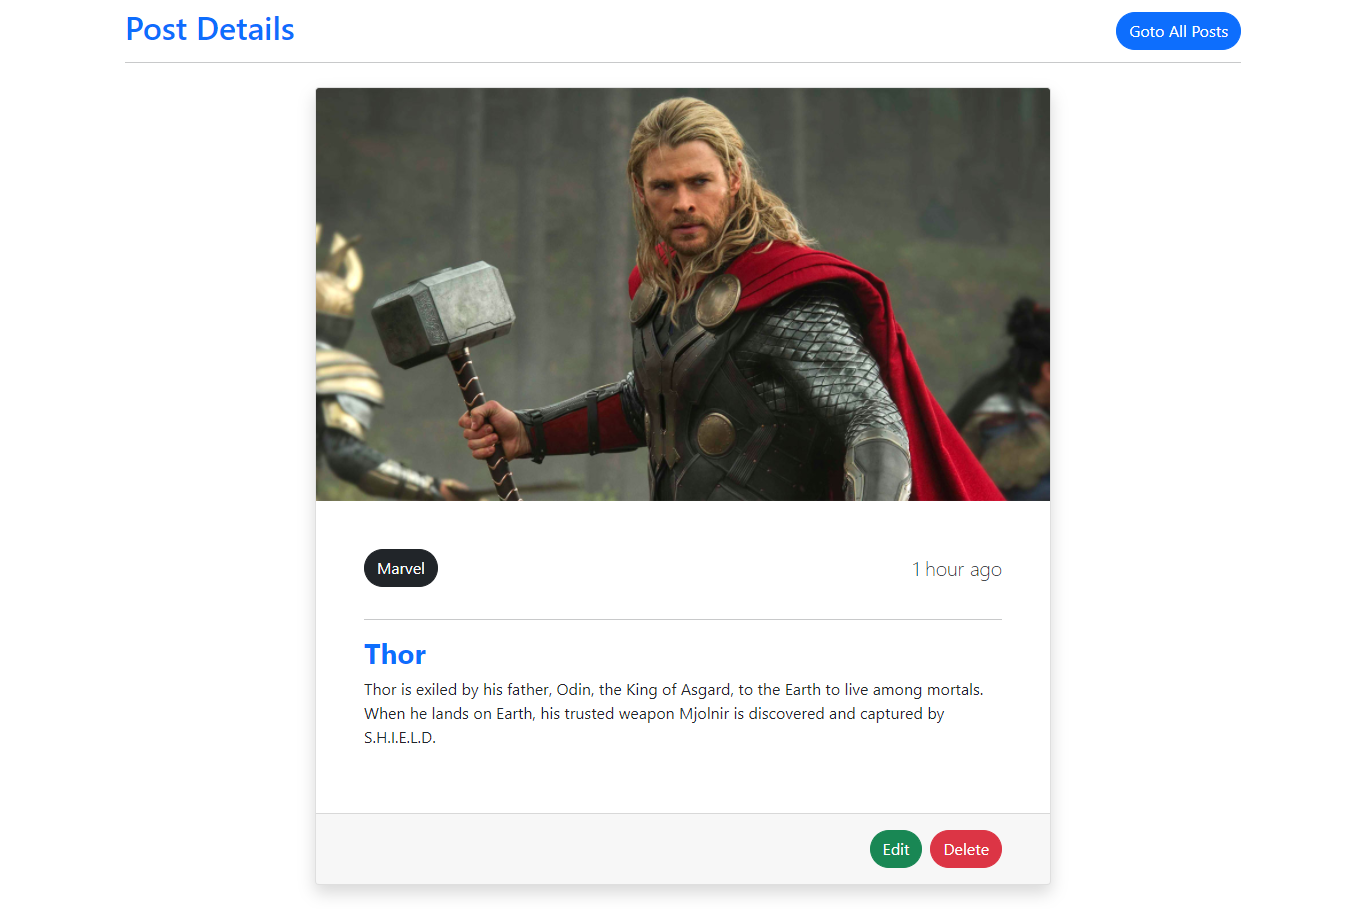
Single Post Details Page
Now in order to fix the pagination issue, you have to add one line code to the app/Providers/AppServiceProvider.php file. Just use the below codes inside the boot() method.
Paginator::useBootstrap();Step 9: Serve The Application
Now our application is ready to be served. You just need to run a command to run your CRUD Application. Just use the below command in your terminal:
php artisan serveNow open your browser and put http://127.0.0.1:8000/post to the address bar and hit enter to use your application.
Sahil Kumar
Full Stack Web Developer
Hello! I'm a part-time blogger & YouTuber living in India. This is my personal blog where I write Web Design & Development tutorial posts!
Know more about me
SUBMIT GUEST POST 🚀
Ready to contribute? Head to the article dashboard to publish your own insightful articles and share them with our audience!
Go to dashboardRECENT POSTS

How Digital Marketing Drives Growth in eCommerce Businesses
7 months ago
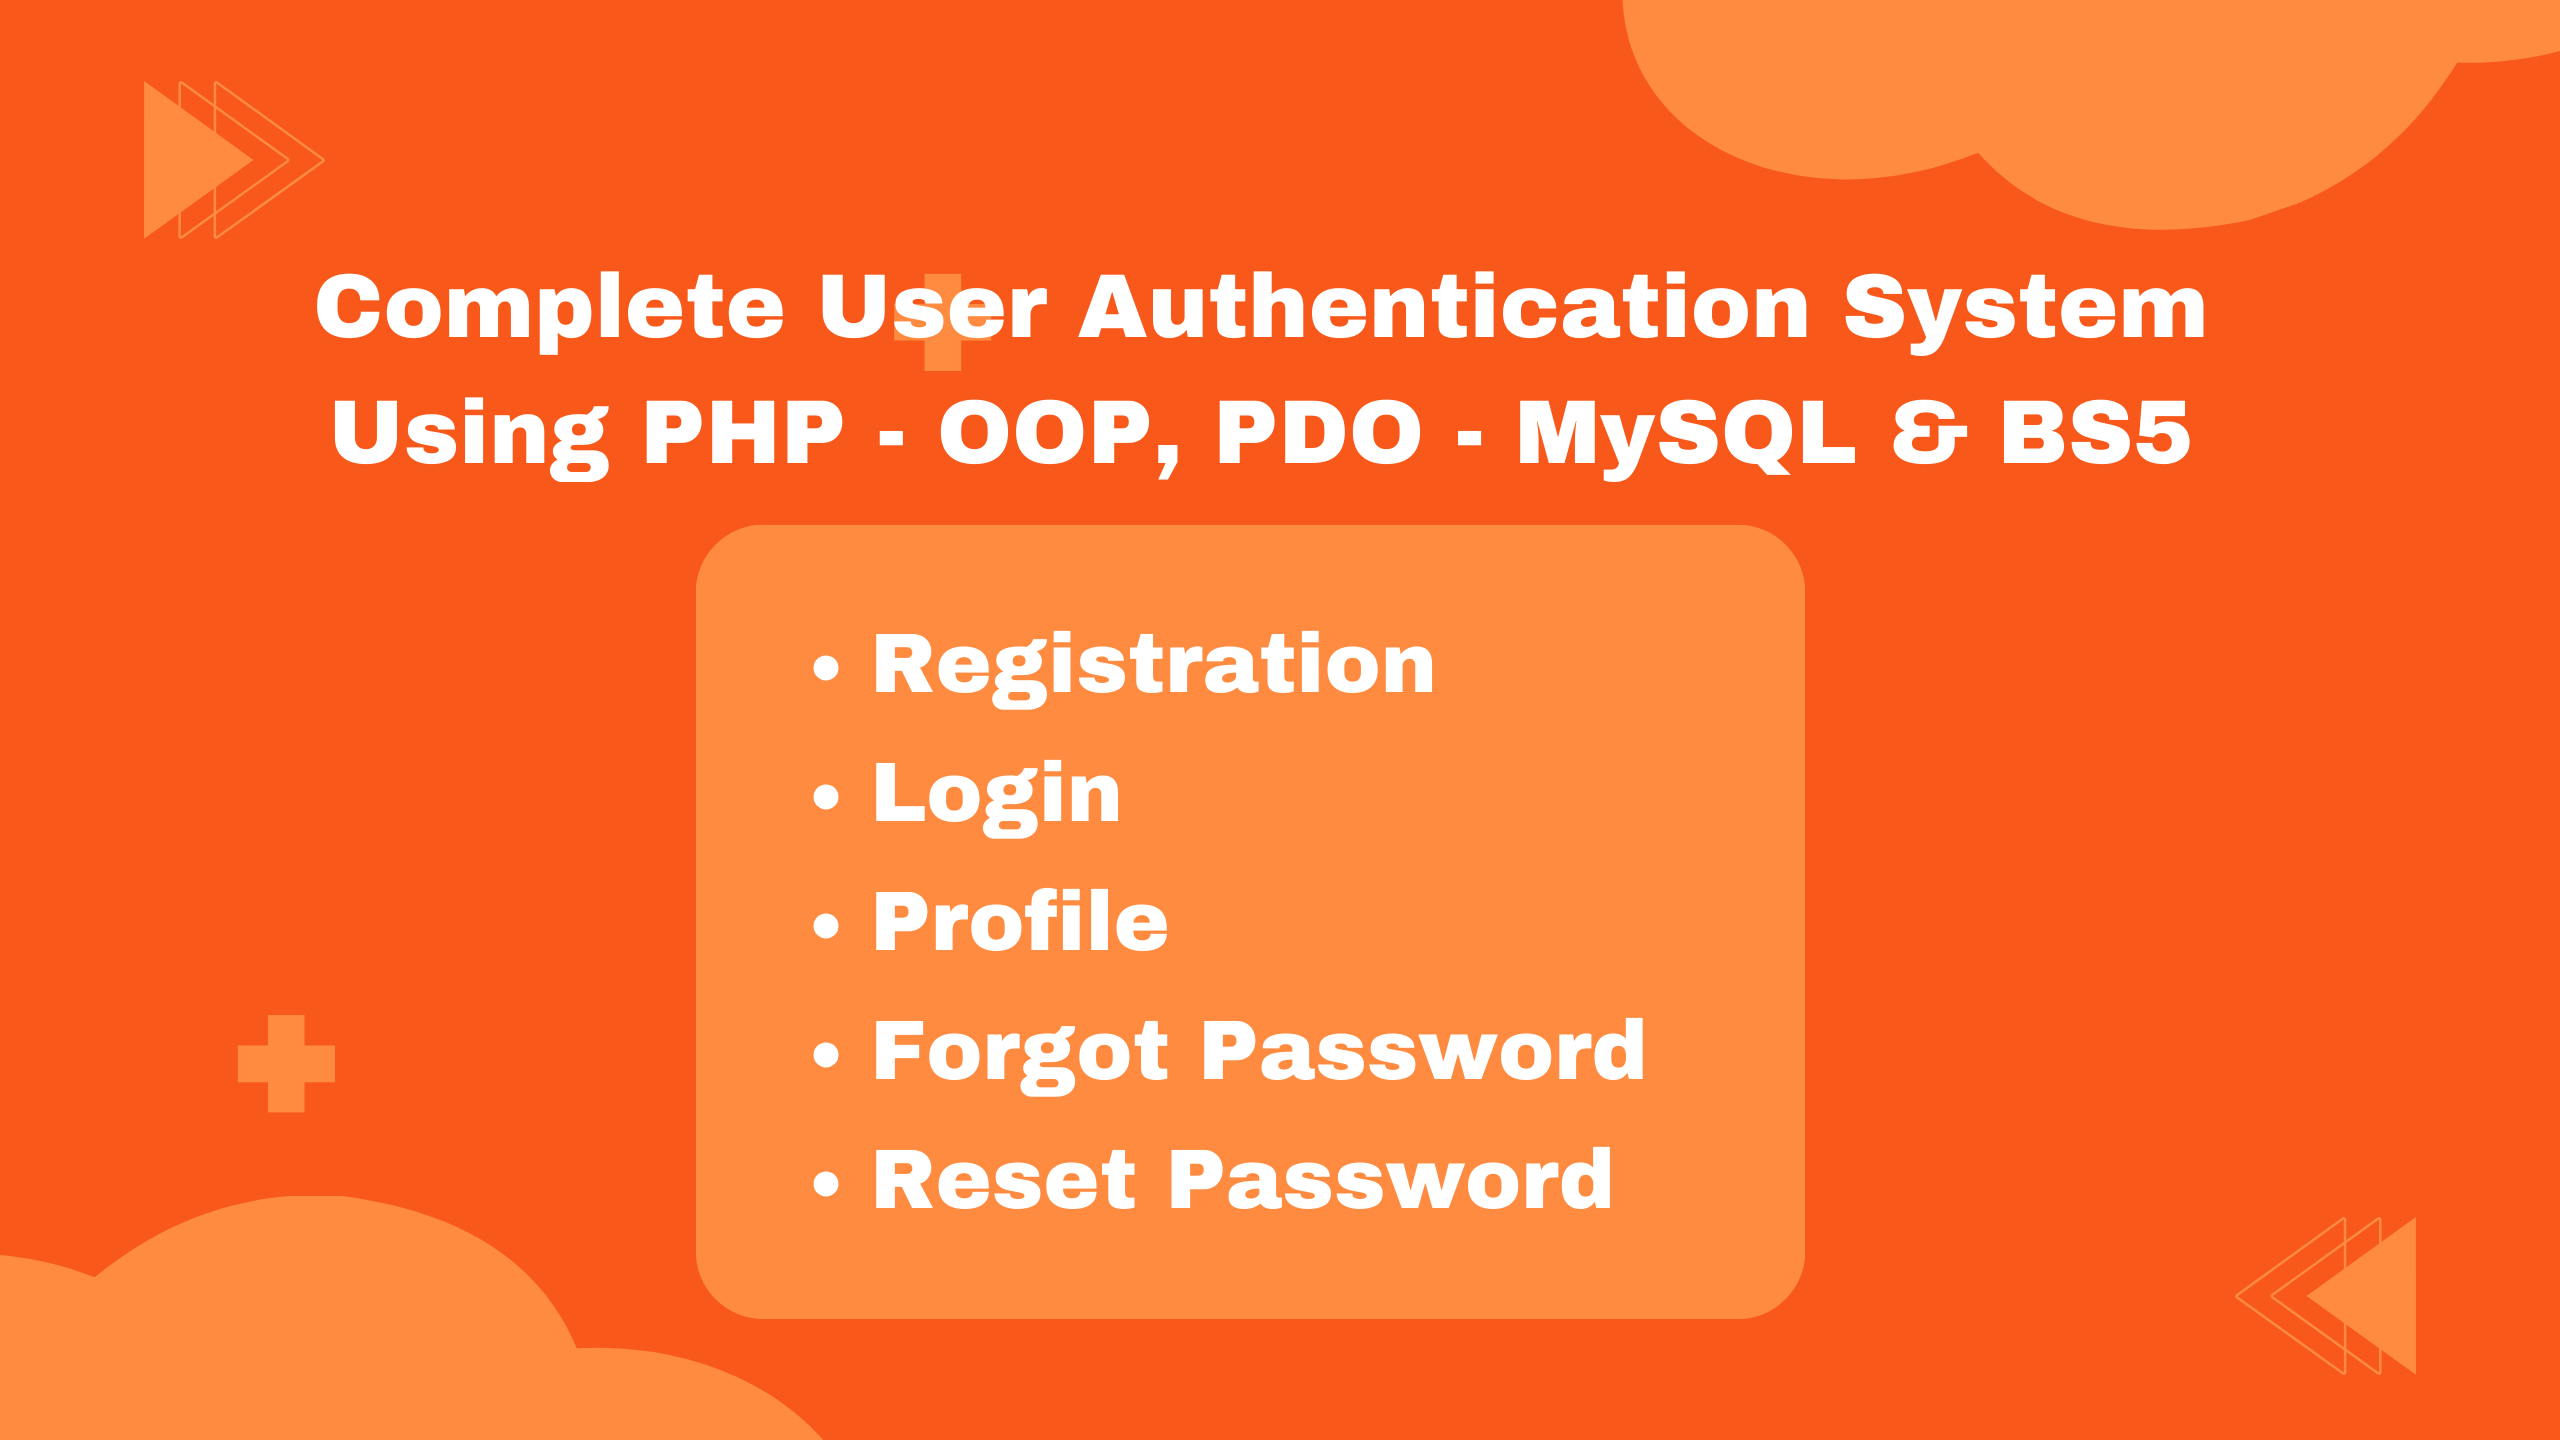
Building a Secure Authentication System with PHP OOP, PDO, MySQL, and Bootstrap 5
7 months ago

10 Essential Web Design Principles for Creating a User-Friendly Website
7 months ago

Send Mail with Contact Form Using PHPMailer & Gmail SMTP | 2023
7 months ago
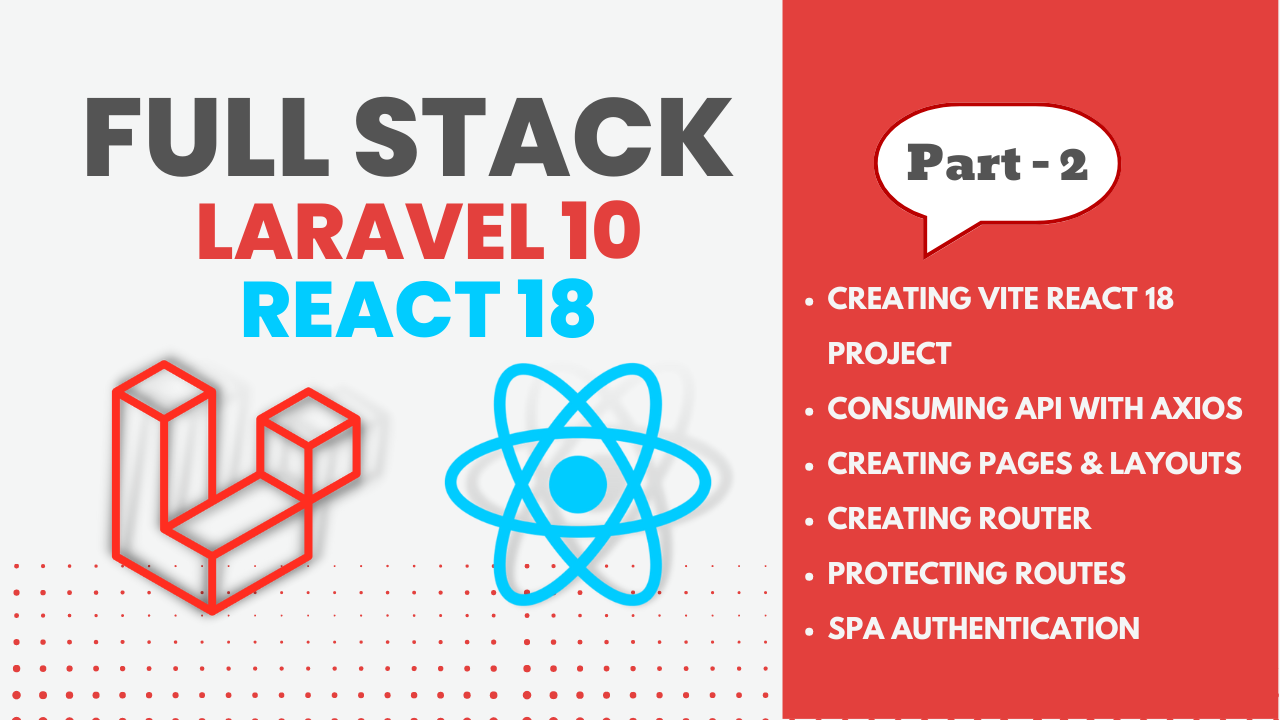
Full Stack Laravel 10 & React JS | SPA Authentication | Part 2
7 months ago