Author
Sahil Kumar
Publihsed On
Dec 16, 2025
Updated On
Dec 16, 2025
Category
PHP
Building a Secure Authentication System with PHP OOP, PDO, MySQL, and Bootstrap 5
In today's digital age, secure authentication systems are crucial for safeguarding user information and maintaining the integrity of web applications. In this blog post, we'll delve into the process of creating a robust authentication system using PHP with Object-Oriented Programming (OOP), PDO (PHP Data Objects), MySQL, and Bootstrap 5. The system will encompass essential functionalities such as login, registration, user profiles, forgot password, and password reset.
So, let's dive into this tutorial. I'll show you all in steps wise.
Step 1: (Create Project Directory, Database & Table)
In this step create a project directory anywhere you want. I'm creating in my desktop.
Open your PHPMyAdmin and create a new database, name it anything you want. I kept php_auth. Now copy below codes and then go to SQL tab in PHPMyAdmin with the selected database that you just created and paste all the SQL code in the field and then click on Go button. This will create a table with name users with some columns.
-- phpMyAdmin SQL Dump
-- version 5.2.0
-- https://www.phpmyadmin.net/
--
-- Host: 127.0.0.1
-- Generation Time: Dec 15, 2023 at 02:25 PM
-- Server version: 10.4.24-MariaDB
-- PHP Version: 8.1.6

SET SQL_MODE = "NO_AUTO_VALUE_ON_ZERO";
START TRANSACTION;
SET time_zone = "+00:00";


/*!40101 SET @OLD_CHARACTER_SET_CLIENT=@@CHARACTER_SET_CLIENT */;
/*!40101 SET @OLD_CHARACTER_SET_RESULTS=@@CHARACTER_SET_RESULTS */;
/*!40101 SET @OLD_COLLATION_CONNECTION=@@COLLATION_CONNECTION */;
/*!40101 SET NAMES utf8mb4 */;

--
-- Database: `php_auth`
--

-- --------------------------------------------------------

--
-- Table structure for table `users`
--

CREATE TABLE `users` (
  `id` int(11) NOT NULL,
  `name` varchar(255) COLLATE utf8_unicode_ci NOT NULL,
  `email` varchar(255) COLLATE utf8_unicode_ci NOT NULL,
  `password` varchar(255) COLLATE utf8_unicode_ci NOT NULL,
  `token` varchar(255) COLLATE utf8_unicode_ci DEFAULT NULL,
  `created_at` timestamp NOT NULL DEFAULT current_timestamp(),
  `updated_at` timestamp NOT NULL DEFAULT current_timestamp()
) ENGINE=InnoDB DEFAULT CHARSET=utf8 COLLATE=utf8_unicode_ci;

--
-- Indexes for dumped tables
--

--
-- Indexes for table `users`
--
ALTER TABLE `users`
  ADD PRIMARY KEY (`id`);

--
-- AUTO_INCREMENT for dumped tables
--

--
-- AUTO_INCREMENT for table `users`
--
ALTER TABLE `users`
  MODIFY `id` int(11) NOT NULL AUTO_INCREMENT, AUTO_INCREMENT=8;
COMMIT;

/*!40101 SET CHARACTER_SET_CLIENT=@OLD_CHARACTER_SET_CLIENT */;
/*!40101 SET CHARACTER_SET_RESULTS=@OLD_CHARACTER_SET_RESULTS */;
/*!40101 SET COLLATION_CONNECTION=@OLD_COLLATION_CONNECTION */;
Now open project directory in your favorite code editor, I'm using Visual Code and let's start writing some codes:
Step 2: (Create config.php file)
In this step, I'll create a config.php file where I'll define all the credentials which I'll use in this application. So create a config.php in the root of the project directory and copy the below code and paste into your file.
<?php
// base url generating dynamically, you can also set static url if you are keeping your project in htdocs folder
// define('BASE_URL', 'http://localhost/php-auth');
define('BASE_URL', isset($_SERVER['HTTPS']) && $_SERVER['HTTPS'] === 'on' ? "https" : "http" . "://" . $_SERVER['HTTP_HOST']);

// database credentials
define('DB_HOST', 'localhost');
define('DB_USER', 'root');
define('DB_PASS', '');
define('DB_NAME', 'php_auth');

// smtp2go.com api key for email sending
define('MAIL_API_KEY', 'api-xxxxxxxxxxxxxxxxxxxxxxxxxxxxxxxxxx');
For mail sending I'm using smtp2go.com, this provides free plan to send email using API.
Step 2: (Create utils.php file)
The "utils.php" file encapsulates a set of utility functions essential for enhancing the functionality and security of a PHP-based web application. The class named "Utils" contains methods that perform common tasks such as data sanitization, redirection, flash messaging, and checking user login status. The "sanitize" method ensures that input data is free from potential security vulnerabilities by trimming, removing slashes, and converting special characters. The "redirect" method facilitates smooth page navigation by redirecting users to the specified page within the application. Moreover, the "setFlash" and "displayFlash" methods handle the setting and presentation of flash messages, offering a clean and effective way to communicate notifications or alerts to users.
Beyond user interface interactions, the "Utils" class extends its functionality to email communication through the "sendMail" method. Leveraging the SMTP2GO API, this method enables the application to dispatch emails, facilitating features like password recovery or account verification. The inclusion of external services, such as SMTP2GO, enhances the robustness of the application's email delivery capabilities. In summary, the "utils.php" file consolidates crucial utility functions that contribute to the overall efficiency, security, and user experience of a PHP web application.
It's important to note that the file also defines a constant, "BASE_URL," which is likely sourced from the "config.php" file, providing a base URL for constructing absolute paths in the application.
<?php
require_once 'config.php';
class Utils {
  // method to sanitize data
  public static function sanitize($data) {
    $data = trim($data);
    $data = htmlspecialchars($data);
    $data = stripslashes($data);
    return $data;
  }
  // method to redirect to a page
  public static function redirect($page) {
    $home_url = BASE_URL;
    header('location: ' . $home_url . '/' . $page);
  }

  // method to set a flash message
  public static function setFlash($name, $message) {
    if (!empty($_SESSION[$name])) {
      unset($_SESSION[$name]);
    }
    $_SESSION[$name] = $message;
  }

  // method to display a flash message
  public static function displayFlash($name, $type) {
    if (isset($_SESSION[$name])) {
      echo '<div class="alert alert-' . $type . '">' . $_SESSION[$name] . '</div>';
      unset($_SESSION[$name]);
    }
  }

  // method to check if user is logged in
  public static function isLoggedIn() {
    if (isset($_SESSION['user'])) {
      return true;
    } else {
      return false;
    }
  }


  // send mail
  public static function sendMail($data) {
    $curl = curl_init();

    curl_setopt_array($curl, [
      CURLOPT_URL => "https://api.smtp2go.com/v3/email/send",
      CURLOPT_RETURNTRANSFER => true,
      CURLOPT_ENCODING => "",
      CURLOPT_MAXREDIRS => 10,
      CURLOPT_TIMEOUT => 30,
      CURLOPT_HTTP_VERSION => CURL_HTTP_VERSION_1_1,
      CURLOPT_CUSTOMREQUEST => "POST",
      CURLOPT_POSTFIELDS => json_encode($data),
      CURLOPT_HTTPHEADER => [
        "Accept: application/json",
        "Content-Type: application/json"
      ],
    ]);

    curl_exec($curl);
    $err = curl_error($curl);

    curl_close($curl);

    if ($err) {
      return false;
    } else {
      return true;
    }
  }
}
Step 3: (Create index.php file - Login Page)
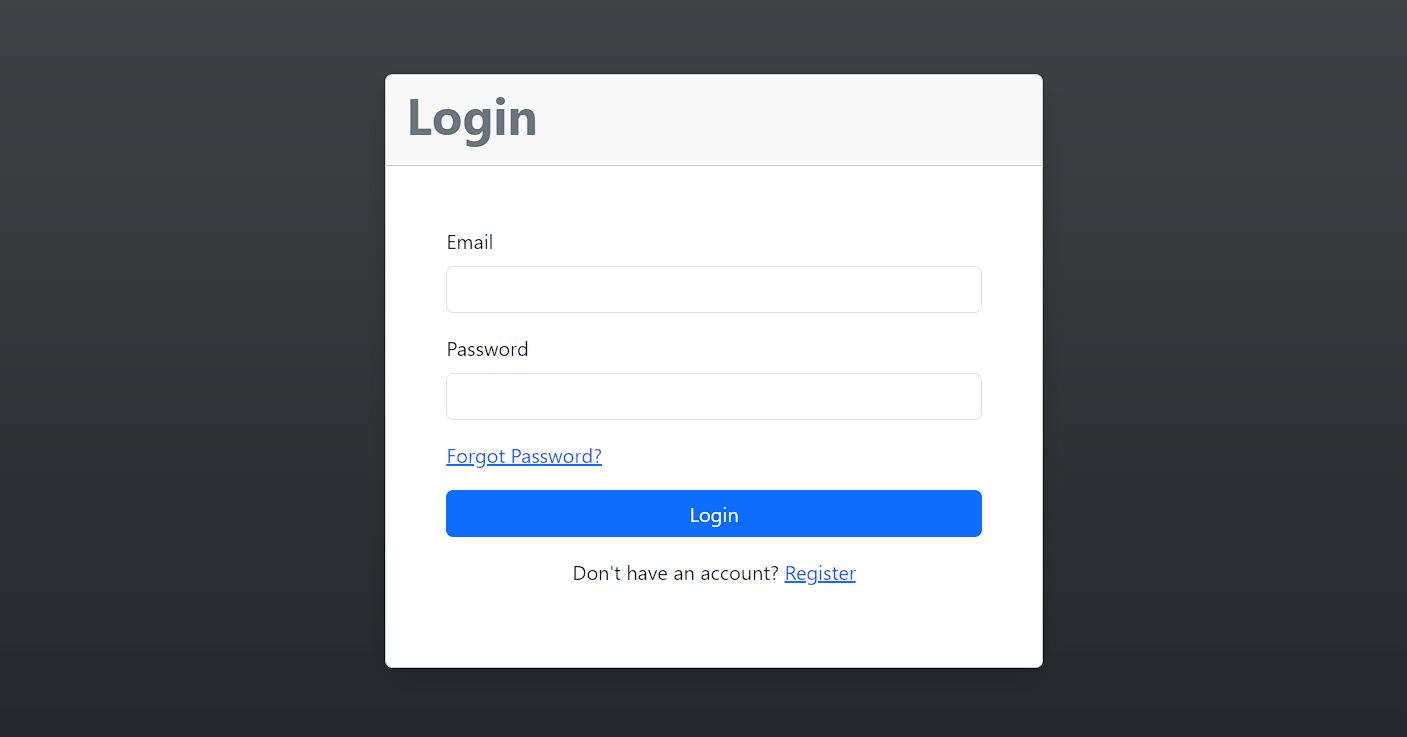
The "index.php" file serves as the login page for a web application, featuring a well-structured and visually appealing design facilitated by Bootstrap 5. The PHP session is initiated at the beginning of the file, crucial for maintaining user data across pages. The script checks whether a user is already logged in using the Utils::isLoggedIn() function from the "utils.php" file and redirects them to the profile page if authenticated. The HTML content is encapsulated within a Bootstrap card component, providing a clean layout for the login form.
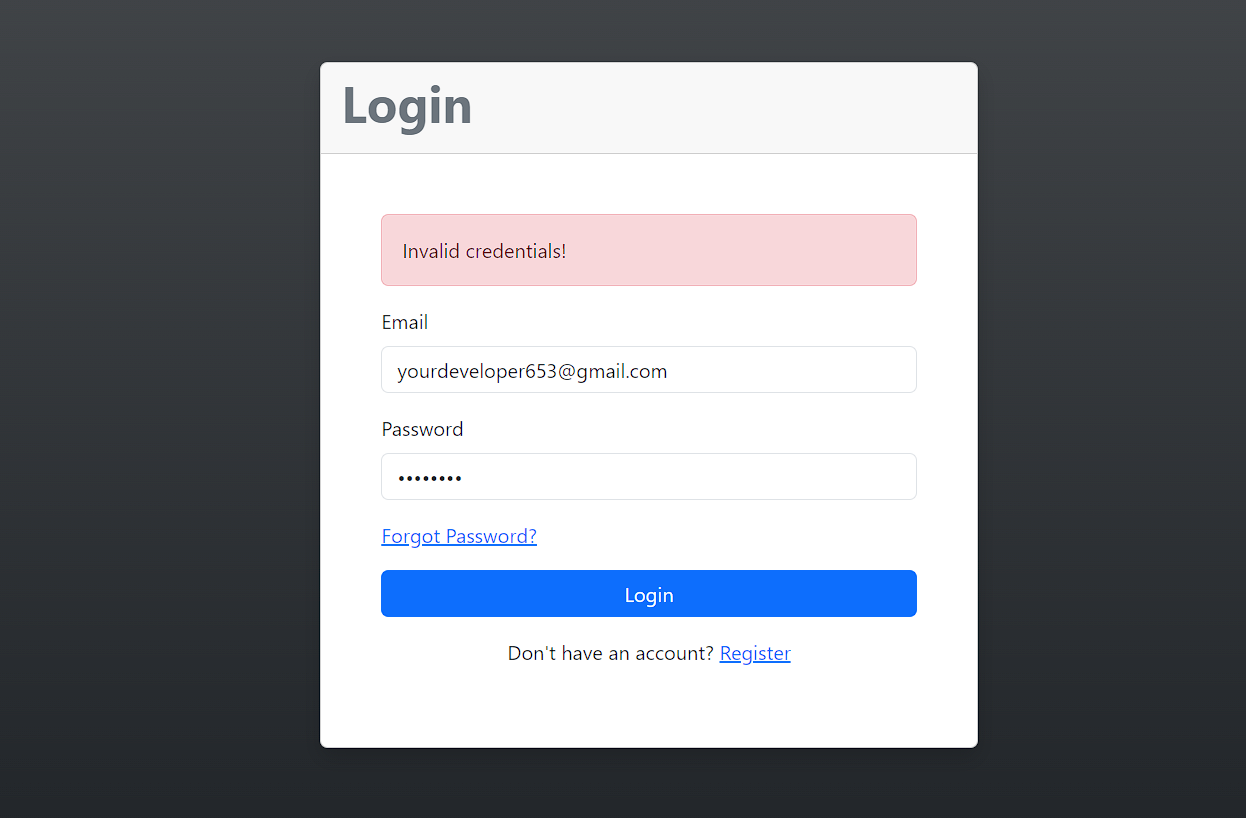
The login form itself is straightforward, with input fields for email and password. The form is submitted to "action.php" using the POST method. Flash messages, displayed using Utils::displayFlash(), offer feedback to users, notifying them of successful registrations or login errors. Additionally, convenient links are provided for users who may have forgotten their password or wish to register for a new account. Overall, the "index.php" file combines usability with visual appeal, creating an effective entry point for users to authenticate into the web application.
<?php
// Start session
session_start();
require_once 'utils.php';

// Redirect to profile if logged in
if (Utils::isLoggedIn()) {
  Utils::redirect('profile.php');
}
?>
<!DOCTYPE html>
<html lang="en">

<head>
  <meta charset="UTF-8">
  <meta name="viewport" content="width=device-width, initial-scale=1.0">
  <title>Login</title>
  <link rel='stylesheet' href='https://cdnjs.cloudflare.com/ajax/libs/twitter-bootstrap/5.3.1/css/bootstrap.min.css' />
</head>

<body class="bg-dark bg-gradient">
  <div class="container">
    <div class="row justify-content-center align-items-center min-vh-100">
      <div class="col-md-5">
        <div class="card shadow">
          <div class="card-header">
            <h1 class="fw-bold text-secondary">Login</h1>
          </div>
          <div class="card-body p-5">
            <?php
            // Display flash messages
            echo Utils::displayFlash('register_success', 'success');
            echo Utils::displayFlash('login_error', 'danger');

            ?>
            <form action="action.php" method="POST">
              <input type="hidden" name="login" value="1">
              <div class="mb-3">
                <label for="email" class="form-label">Email</label>
                <input type="text" name="email" id="email" class="form-control" required>
              </div>
              <div class="mb-3">
                <label for="password" class="form-label">Password</label>
                <input type="password" name="password" id="password" class="form-control" required>
              </div>
              <div class="mb-3">
                <a href="forgot.php">Forgot Password?</a>
              </div>
              <div class="mb-3 d-grid">
                <input type="submit" value="Login" class="btn btn-primary">
              </div>
              <p class="text-center">Don't have an account? <a href="/register.php">Register</a></p>
            </form>
          </div>
        </div>
      </div>
    </div>
  </div>
</body>

</html>
Step 4: (Create register.php file - Register Page)
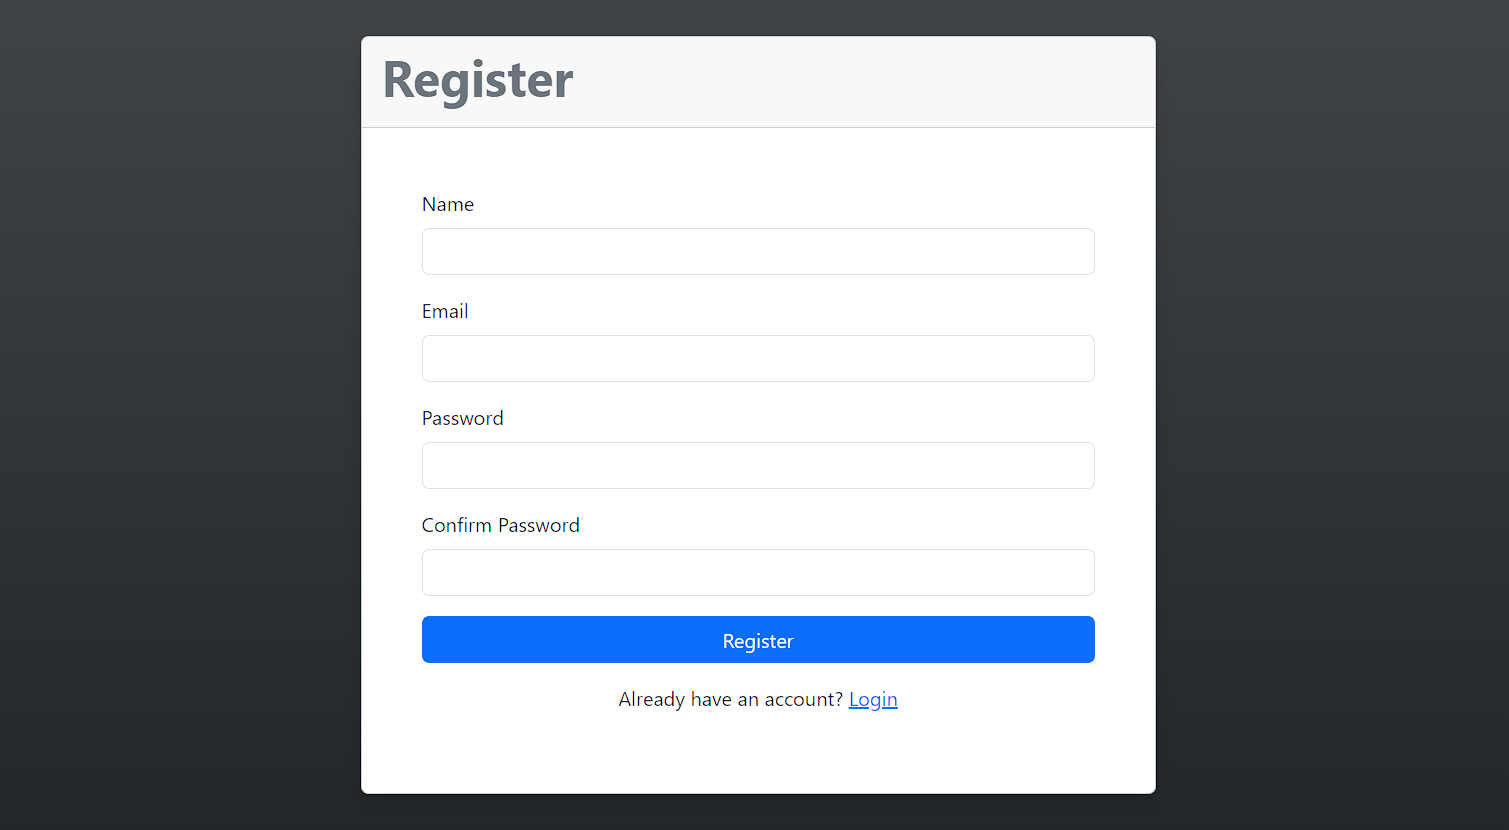
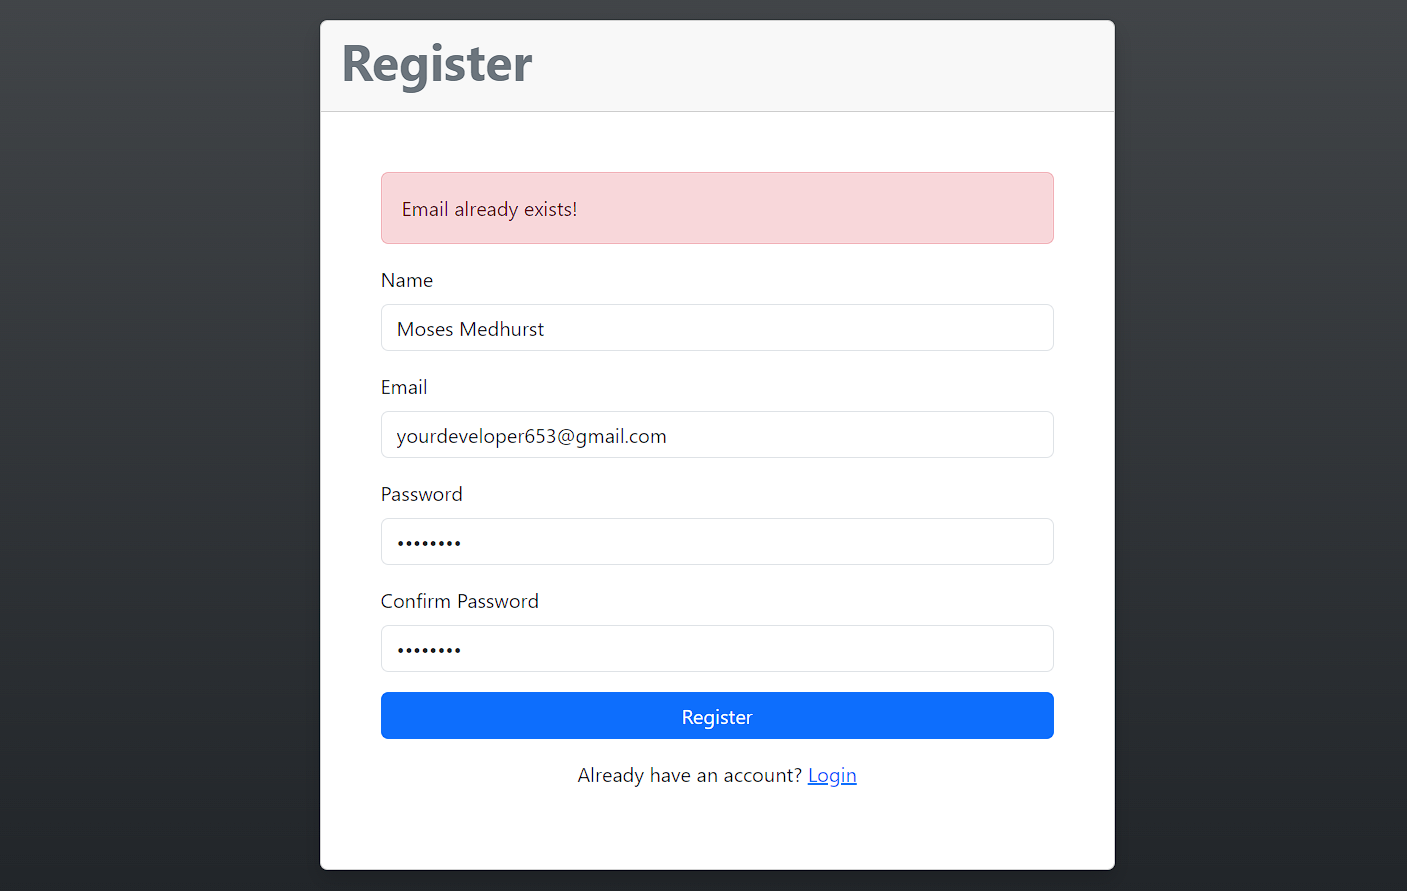
The "register.php" file serves as the registration page for a web application, providing users with a streamlined process to create new accounts. The PHP session is initiated at the beginning of the file, allowing for the persistence of user data across multiple pages. The script includes the "utils.php" file, which houses a collection of utility functions for tasks such as data sanitization, redirection, and flash messaging. The registration page employs Bootstrap 5 for styling, ensuring a visually cohesive and responsive design.
The main content of the page is encapsulated within a Bootstrap card component, offering a clean layout for the registration form. The form itself includes input fields for the user's name, email, password, and a confirmation field for re-entering the password. Form submissions are directed to "action.php" using the POST method, indicating that the registration logic is likely handled in that file. Error messages are displayed using the "Utils::displayFlash()" method, providing users with immediate feedback in case of registration errors. Additionally, a link is provided for users who already have an account, redirecting them to the login page.
In summary, the "register.php" file combines essential PHP functionalities, Bootstrap styling, and utility functions from "utils.php" to create an intuitive and aesthetically pleasing registration page for users to sign up and access the web application.
<?php
// Session start
session_start();
require_once 'utils.php';

// Redirect to profile page if user is already logged in
if (Utils::isLoggedIn()) {
  Utils::redirect('profile.php');
}
?>
<!DOCTYPE html>
<html lang="en">

<head>
  <meta charset="UTF-8">
  <meta name="viewport" content="width=device-width, initial-scale=1.0">
  <title>Register</title>
  <link rel='stylesheet' href='https://cdnjs.cloudflare.com/ajax/libs/twitter-bootstrap/5.3.1/css/bootstrap.min.css' />
</head>

<body class="bg-dark bg-gradient">
  <div class="container">
    <div class="row justify-content-center align-items-center min-vh-100">
      <div class="col-md-6">
        <div class="card shadow">
          <div class="card-header">
            <h1 class="fw-bold text-secondary">Register</h1>
          </div>
          <div class="card-body p-5">
            <?php
            // Display error message if any
            echo Utils::displayFlash('register_error', 'danger');
            ?>
            <form action="action.php" method="POST">
              <input type="hidden" name="register" value="1">
              <div class="mb-3">
                <label for="name" class="form-label">Name</label>
                <input type="text" name="name" id="name" class="form-control" required>
              </div>
              <div class="mb-3">
                <label for="email" class="form-label">Email</label>
                <input type="text" name="email" id="email" class="form-control" required>
              </div>
              <div class="mb-3">
                <label for="password" class="form-label">Password</label>
                <input type="password" name="password" id="password" class="form-control" required>
              </div>
              <div class="mb-3">
                <label for="confirm_password" class="form-label">Confirm Password</label>
                <input type="password" name="confirm_password" id="confirm_password" class="form-control" required>
              </div>
              <div class="mb-3 d-grid">
                <input type="submit" value="Register" class="btn btn-primary">
              </div>
              <p class="text-center">Already have an account? <a href="/">Login</a></p>
            </form>
          </div>
        </div>
      </div>
    </div>
  </div>
</body>

</html>
Step 5: (Create profile.php file - Profile Page)
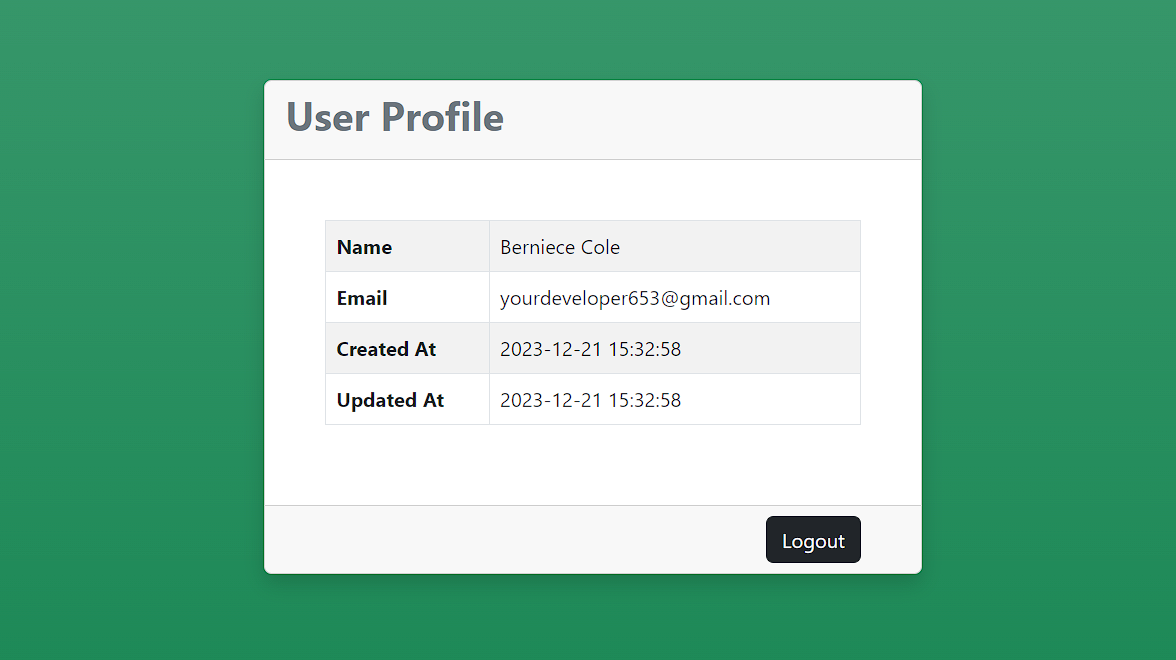
The "profile.php" page serves as the user profile display for a web application, providing an organized and visually appealing layout using Bootstrap 5. The PHP script starts by including the "utils.php" file, which likely contains utility functions and class definitions essential for maintaining secure and efficient user sessions. The page checks whether a user is logged in using the "Utils::isLoggedIn()" method. If not, the user is redirected to the login page, ensuring that only authenticated users can access their profiles.
Upon successful authentication, the page retrieves user information from the session and dynamically populates a Bootstrap card component with a tabular representation of the user's profile details. The displayed information includes the user's name, email, and timestamps indicating when the account was created and last updated. A logout button at the footer allows users to securely log out of their accounts, linking to "action.php" with the appropriate query parameter for handling logout functionality.
In summary, the "profile.php" page combines PHP logic for session management, Bootstrap styling for a clean user interface, and dynamic content rendering to present a user's profile information in an organized and user-friendly manner. The page prioritizes both security and user experience, providing an intuitive interface for users to view and manage their profiles within the web application.
<?php
require_once 'utils.php';

// check if user is logged in or not and redirect to login page
session_start();
if (!Utils::isLoggedIn()) {
  Utils::redirect('./');
}

// get user from session
$user = null;
if (isset($_SESSION['user'])) {
  $user = $_SESSION['user'];
}

?>
<!DOCTYPE html>
<html lang="en">

<head>
  <meta charset="UTF-8">
  <meta name="viewport" content="width=device-width, initial-scale=1.0">
  <title>Profile</title>
  <link rel='stylesheet' href='https://cdnjs.cloudflare.com/ajax/libs/twitter-bootstrap/5.3.1/css/bootstrap.min.css' />
</head>

<body class="bg-success bg-gradient">
  <div class="container">
    <div class="row justify-content-center align-items-center min-vh-100">
      <div class="col-lg-5">
        <div class="card shadow">
          <div class="card-header">
            <h2 class="fw-bold text-secondary">User Profile</h2>
          </div>
          <div class="card-body p-5">
            <table class="table table-striped table-bordered">
              <tr>
                <th>Name</th>
                <td><?php echo $user['name']; ?></td>
              </tr>
              <tr>
                <th>Email</th>
                <td><?php echo $user['email']; ?></td>
              </tr>
              <tr>
                <th>Created At</th>
                <td><?php echo $user['created_at']; ?></td>
              </tr>
              <tr>
                <th>Updated At</th>
                <td><?php echo $user['updated_at']; ?></td>
              </tr>
            </table>
          </div>
          <div class="card-footer px-5 text-end">
            <a href="action.php?logout=1" class="btn btn-dark">Logout</a>
          </div>
        </div>
      </div>
    </div>
  </div>


</body>

</html>
Step 6: (Create forgot.php file - Forgot Password Page)
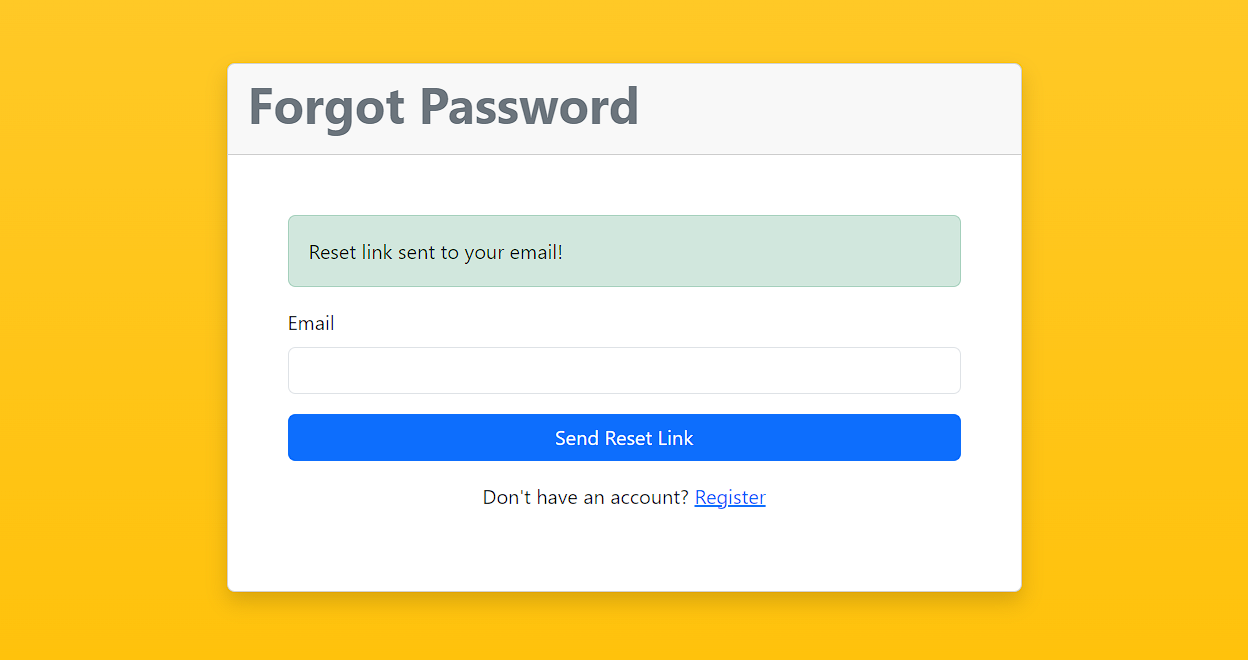
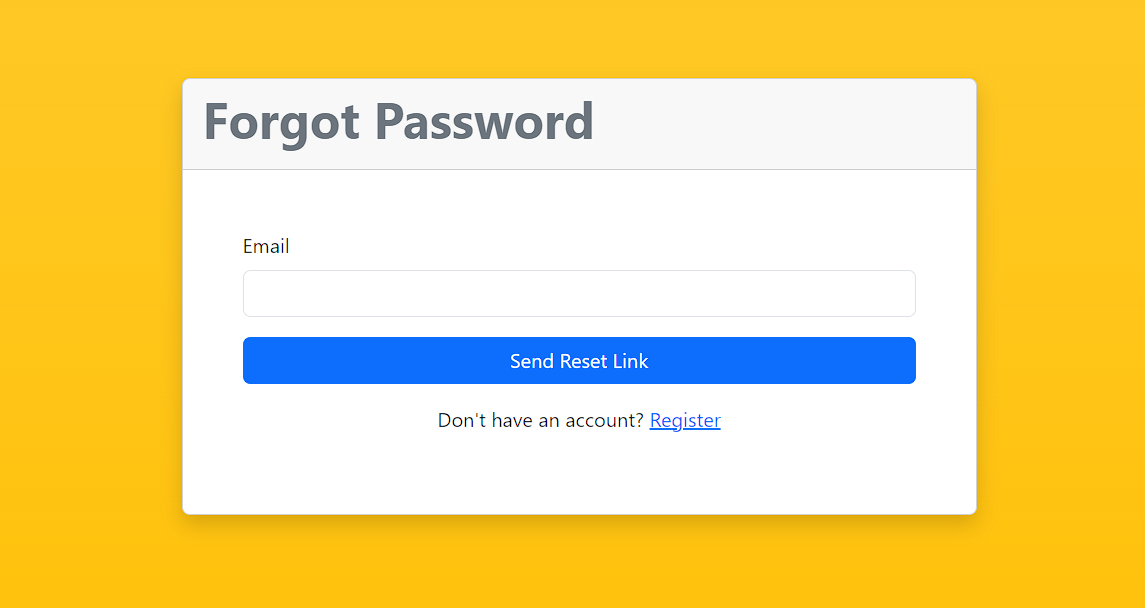
The "forgot.php" page is designed to facilitate the password recovery process within a web application. Initiating with a session start and redirect logic to ensure that authenticated users are directed to their profiles, the page employs a Bootstrap-styled layout to enhance user experience. The PHP script includes the "utils.php" file, likely containing utility functions crucial for session management, flash messaging, and other common tasks.
The main content of the page consists of a card component housing a form for users to input their email addresses for password recovery. The form submission is handled by "action.php" using the POST method, with a hidden input indicating the "forgot" action. Error and success messages are displayed using the "Utils::displayFlash()" method, offering users immediate feedback regarding the status of their password recovery request. The page provides a straightforward and user-friendly interface, encouraging users to input their email addresses and trigger the process of resetting their forgotten passwords. Additionally, a link is included for users who do not have an account, redirecting them to the registration page.
In summary, the "forgot.php" page is a pivotal component in the web application's user authentication flow, ensuring a secure and user-centric approach to password recovery. The combination of PHP logic and Bootstrap styling contributes to a seamless and visually pleasing experience for users seeking assistance with forgotten passwords.
<?php
// Start session
session_start();
require_once 'utils.php';
// Redirect to profile if logged in
if (Utils::isLoggedIn()) {
  Utils::redirect('profile.php');
}
?>

<!DOCTYPE html>
<html lang="en">

<head>
  <meta charset="UTF-8">
  <meta name="viewport" content="width=device-width, initial-scale=1.0">
  <title>Forgot Password</title>
  <link rel='stylesheet' href='https://cdnjs.cloudflare.com/ajax/libs/twitter-bootstrap/5.3.1/css/bootstrap.min.css' />
</head>

<body class="bg-warning bg-gradient">

  <div class="container">
    <div class="row justify-content-center align-items-center min-vh-100">
      <div class="col-md-6">
        <div class="card shadow">
          <div class="card-header">
            <h1 class="fw-bold text-secondary">Forgot Password</h1>
          </div>
          <div class="card-body p-5">
            <?php
            echo Utils::displayFlash('forgot_error', 'danger');
            echo Utils::displayFlash('forgot_success', 'success');
            ?>
            <form action="action.php" method="POST">
              <input type="hidden" name="forgot" value="1">
              <div class="mb-3">
                <label for="email" class="form-label">Email</label>
                <input type="text" name="email" id="email" class="form-control" required>
              </div>
              <div class="mb-3 d-grid">
                <input type="submit" value="Send Reset Link" class="btn btn-primary">
              </div>
              <p class="text-center">Don't have an account? <a href="/register.php">Register</a></p>
            </form>
          </div>
        </div>
      </div>
    </div>
  </div>

</body>

</html>
Step 7: (Create reset.php file - Reset Password Page)
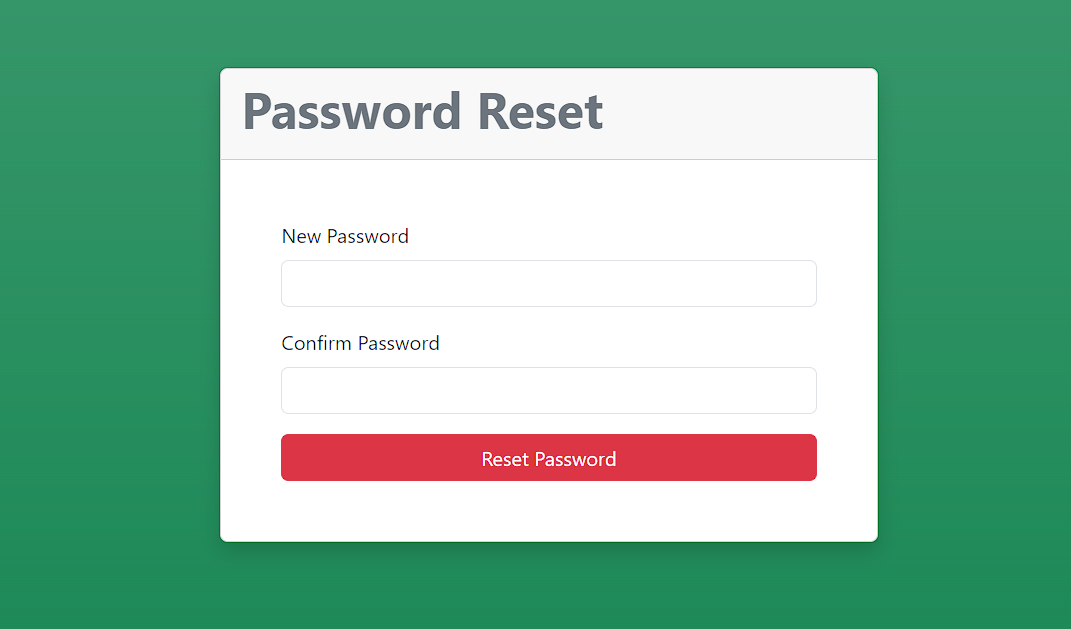
The "reset.php" page is dedicated to facilitating the password reset functionality within a web application. Beginning with session initialization and a redirection check to ensure logged-in users are redirected to their profiles, the page leverages Bootstrap 5 for a visually coherent and responsive layout. The "utils.php" file, likely containing utility functions for session management and flash messaging, is included in the PHP script.
The core content of the page comprises a card component housing a form for users to reset their passwords. The form is submitted to "action.php" using the POST method, with hidden inputs for the "reset" action and a token retrieved from the URL query parameter ($_GET['token']). This token likely serves as a security measure to verify the authenticity of the password reset request. Error and success messages are displayed using the "Utils::displayFlash()" method, promptly notifying users about the outcome of their password reset attempts.
In summary, the "reset.php" page orchestrates the password reset process within the web application, providing users with a secure and intuitive interface to set a new password. By combining PHP logic with Bootstrap styling, the page ensures a seamless and visually appealing experience for users undergoing the password reset procedure, ultimately contributing to a robust and user-friendly authentication system.
<?php

// Start session
session_start();
require_once 'utils.php';

// Redirect to profile if logged in
if (Utils::isLoggedIn()) {
  Utils::redirect('profile.php');
}
?>

<!DOCTYPE html>
<html lang="en">

<head>
  <meta charset="UTF-8">
  <meta name="viewport" content="width=device-width, initial-scale=1.0">
  <title>Password Reset</title>
  <link rel='stylesheet' href='https://cdnjs.cloudflare.com/ajax/libs/twitter-bootstrap/5.3.1/css/bootstrap.min.css' />
</head>

<body class="bg-success bg-gradient">
  <div class="container">
    <div class="row min-vh-100 justify-content-center align-items-center">
      <div class="col-lg-5">
        <div class="card shadow">
          <div class="card-header">
            <h1 class="fw-bold text-secondary">Password Reset</h1>
          </div>
          <div class="card-body p-5">
            <?php
            echo Utils::displayFlash('reset_error', 'danger');
            echo Utils::displayFlash('reset_success', 'success');
            ?>
            <form action="action.php" method="POST">
              <input type="hidden" name="reset" value="1">
              <input type="hidden" name="token" value="<?php echo $_GET['token']; ?>">
              <div class="mb-3">
                <label for="password" class="form-label">New Password</label>
                <input type="password" name="password" class="form-control" id="password" required>
              </div>
              <div class="mb-3">
                <label for="confirm_password" class="form-label">Confirm Password</label>
                <input type="password" name="confirm_password" class="form-control" id="confirm_password" required>
              </div>
              <div class="d-grid">
                <input type="submit" class="btn btn-danger" value="Reset Password">
              </div>
            </form>
          </div>
        </div>
      </div>
    </div>
  </div>

</body>

</html>
Step 8: (Create database.php file)
The "database.php" file encapsulates a PHP class named "Database," which serves as an essential component for interacting with a MySQL database in a web application. The class establishes a connection to the database during instantiation and includes various methods to perform operations such as user registration, login, email existence check, token handling, and password updates.
The class utilizes PDO (PHP Data Objects) for database connectivity, providing a secure and efficient means of interacting with the MySQL database. It incorporates constants from the "config.php" file for database configuration, ensuring a centralized and easily modifiable setup.
The "register" method inserts a new user into the "users" table with provided name, email, and hashed password. The "login" method retrieves a user based on email, verifies the password using password_verify, and returns the user information if authentication is successful. The "getUserByEmail" method checks whether an email already exists in the database. The "setToken" method updates the user's token for password reset purposes. The "getUserByToken" method retrieves a user based on the provided token, typically used during the password reset process. Finally, the "updatePassword" method updates the user's password and resets the token.
Overall, the "database.php" file consolidates the database-related functionalities into a reusable class, promoting clean and organized code architecture for secure user authentication and data management in a PHP web application.
<?php
require_once 'config.php';
class Database {
  private const DSN = 'mysql:host=' . DB_HOST . ';dbname=' . DB_NAME;
  private $conn;

  // method to connect to the database
  public function __construct() {
    try {
      $this->conn = new PDO(self::DSN, DB_USER, DB_PASS);
      $this->conn->setAttribute(PDO::ATTR_ERRMODE, PDO::ERRMODE_EXCEPTION);
      $this->conn->setAttribute(PDO::ATTR_DEFAULT_FETCH_MODE, PDO::FETCH_ASSOC);
    } catch (PDOException $e) {
      echo 'Connection failed: ' . $e->getMessage();
    }
  }

  // method to register a user
  public function register($name, $email, $password) {
    $sql = 'INSERT INTO users (name, email, password) VALUES (:name, :email, :password)';
    $stmt = $this->conn->prepare($sql);
    $stmt->execute([
      'name' => $name,
      'email' => $email,
      'password' => $password
    ]);
  }

  // method to login a user
  public function login($email, $password) {
    $sql = 'SELECT * FROM users WHERE email = :email';
    $stmt = $this->conn->prepare($sql);
    $stmt->execute(['email' => $email]);
    $user = $stmt->fetch(PDO::FETCH_ASSOC);

    if ($user) {
      if (password_verify($password, $user['password'])) {
        return $user;
      } else {
        return false;
      }
    } else {
      return false;
    }
  }

  // method to check if email already exists
  public function getUserByEmail($email) {
    $sql = 'SELECT * FROM users WHERE email = :email';
    $stmt = $this->conn->prepare($sql);
    $stmt->execute(['email' => $email]);
    $user = $stmt->fetch(PDO::FETCH_ASSOC);

    return $user;
  }

  // method to set token
  public function setToken($email, $token) {
    $sql = 'UPDATE users SET token = :token WHERE email = :email';
    $stmt = $this->conn->prepare($sql);
    $stmt->execute([
      'token' => $token,
      'email' => $email
    ]);

    return true;
  }

  // method to get user by token
  public function getUserByToken($token) {
    $sql = 'SELECT * FROM users WHERE token = :token';
    $stmt = $this->conn->prepare($sql);
    $stmt->execute(['token' => $token]);
    $user = $stmt->fetch(PDO::FETCH_ASSOC);

    return $user;
  }


  // method to update password
  public function updatePassword($email, $password) {
    $sql = 'UPDATE users SET password = :password, token = :token WHERE email = :email';
    $stmt = $this->conn->prepare($sql);
    $stmt->execute([
      'password' => $password,
      'token' => null,
      'email' => $email
    ]);

    return true;
  }
}
Step 9: (Create action.php file)
The "action.php" file acts as the endpoint for various user actions within a web application, orchestrating the interaction between the user interface and the backend authentication system. This file relies on the "AuthSystem" class, which is responsible for handling user registration, login, logout, password recovery, and password reset functionalities.
The "AuthSystem" class is instantiated at the beginning of the file, ensuring that its methods are available to process incoming requests. The file then checks the nature of the request—whether it's a registration, login, logout, password recovery, or password reset attempt—and delegates the corresponding method from the "AuthSystem" class to handle the specific action.
For user registration, the "registerUser" method is invoked, where user inputs are sanitized, passwords are verified for a match, and the registration process is executed. Similarly, the "loginUser" and "logoutUser" methods handle user authentication and session termination, respectively.
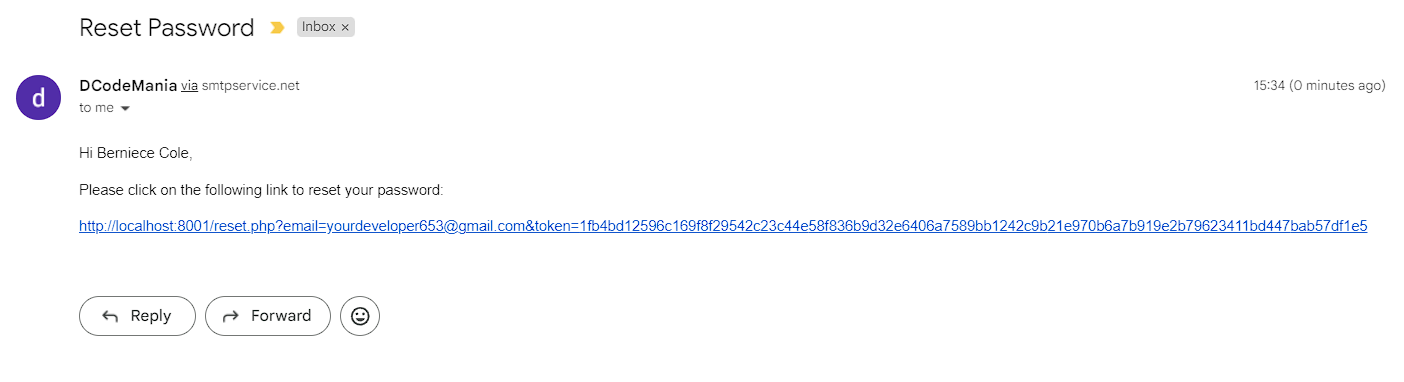
The "forgotPassword" method is triggered when a user requests a password reset. It verifies the existence of the user's email, generates a unique token, and sends a password reset link to the user's email using SMTP. The "resetPassword" method is responsible for processing the password reset, ensuring the validity of the provided token and updating the user's password accordingly.
The bottom part of the file acts as a controller, determining which action to perform based on the received POST or GET parameters. This controller pattern enables a clean separation of concerns and promotes maintainability.
In summary, "action.php" serves as a crucial endpoint, connecting the frontend to the backend authentication system and orchestrating various user-related actions through the "AuthSystem" class. This file is pivotal for maintaining the integrity and security of user accounts within the web application.
<?php
require_once 'utils.php';
require_once 'database.php';

class AuthSystem {
  private $db;

  public function __construct() {
    session_start();
    $this->db = new Database();
  }

  public function registerUser($name, $email, $password, $confirm_password) {
    $name = Utils::sanitize($name);
    $email = Utils::sanitize($email);
    $password = Utils::sanitize($password);
    $confirm_password = Utils::sanitize($confirm_password);

    if ($password !== $confirm_password) {
      Utils::setFlash('register_error', 'Passwords do not match!');
      Utils::redirect('register.php');
    } else {
      $user = $this->db->getUserByEmail($email);
      if ($user) {
        Utils::setFlash('register_error', 'Email already exists!');
        Utils::redirect('register.php');
      } else {
        $hashed_password = password_hash($password, PASSWORD_DEFAULT);
        $this->db->register($name, $email, $hashed_password);
        Utils::setFlash('register_success', 'You are now registered and can login now!');
        Utils::redirect('./');
      }
    }
  }

  public function loginUser($email, $password) {
    $email = Utils::sanitize($email);
    $password = Utils::sanitize($password);

    $user = $this->db->login($email, $password);
    if ($user) {
      unset($user['password']);
      $_SESSION['user'] = $user;
      Utils::redirect('profile.php');
    } else {
      Utils::setFlash('login_error', 'Invalid credentials!');
      Utils::redirect('./');
    }
  }

  public function logoutUser() {
    unset($_SESSION['user']);
    Utils::redirect('./');
  }

  public function forgotPassword($email) {
    $email = Utils::sanitize($email);

    $user = $this->db->getUserByEmail($email);
    if ($user) {
      $token = bin2hex(random_bytes(50));
      $this->db->setToken($email, $token);
      $link = BASE_URL . '/reset.php?email=' . $email . '&token=' . $token;
      $message = '<p>Hi ' . $user['name'] . ',</p><p>Please click on the following link to reset your password:</p><p><a href="' . $link . '">' . $link . '</a></p>';

      $mailData = [
        "api_key" => MAIL_API_KEY,
        "to" => [$email],
        "sender" => "DCodeMania <documents@thehiren.com>",
        "subject" => "Reset Password",
        "text_body" => "Reset Your Password",
        "html_body" => $message
      ];

      if (Utils::sendMail($mailData)) {
        Utils::setFlash('forgot_success', 'Reset link sent to your email!');
        Utils::redirect('forgot.php');
      } else {
        Utils::setFlash('forgot_error', 'Something went wrong!');
        Utils::redirect('forgot.php');
      }
    } else {
      Utils::setFlash('forgot_error', 'Email does not exist!');
      Utils::redirect('forgot.php');
    }
  }

  public function resetPassword($token, $password, $confirm_password) {
    $token = Utils::sanitize($token);
    $password = Utils::sanitize($password);
    $confirm_password = Utils::sanitize($confirm_password);

    if ($password !== $confirm_password) {
      Utils::setFlash('reset_error', 'Passwords do not match!');
      Utils::redirect('reset.php?token=' . $token);
    } else {
      $user = $this->db->getUserByToken($token);
      if ($user) {
        $hashed_password = password_hash($password, PASSWORD_DEFAULT);
        $this->db->updatePassword($user['email'], $hashed_password);
        Utils::setFlash('reset_success', 'Password reset successfully!');
        Utils::redirect('reset.php?token=' . $token);
      } else {
        Utils::setFlash('reset_error', 'Invalid token!');
        Utils::redirect('reset.php?token=' . $token);
      }
    }
  }
}

$authSystem = new AuthSystem();

if (isset($_POST['register'])) {
  $authSystem->registerUser($_POST['name'], $_POST['email'], $_POST['password'], $_POST['confirm_password']);
} elseif (isset($_POST['login'])) {
  $authSystem->loginUser($_POST['email'], $_POST['password']);
} elseif (isset($_GET['logout'])) {
  $authSystem->logoutUser();
} elseif (isset($_POST['forgot'])) {
  $authSystem->forgotPassword($_POST['email']);
} elseif (isset($_POST['reset'])) {
  $authSystem->resetPassword($_POST['token'], $_POST['password'], $_POST['confirm_password']);
}
Step 10: Running Application
Application coding now completed, and you can run your application. To run you can use below command in the terminal:
php -S localhost:8000Step 10: Screenshots of the project
Sahil Kumar
Full Stack Web Developer
Hello! I'm a part-time blogger & YouTuber living in India. This is my personal blog where I write Web Design & Development tutorial posts!
Know more about me
SUBMIT GUEST POST 🚀
Ready to contribute? Head to the article dashboard to publish your own insightful articles and share them with our audience!
Go to dashboardRECENT POSTS

How Digital Marketing Drives Growth in eCommerce Businesses
7 months ago
Building a Secure Authentication System with PHP OOP, PDO, MySQL, and Bootstrap 5
7 months ago

10 Essential Web Design Principles for Creating a User-Friendly Website
7 months ago
Send Mail with Contact Form Using PHPMailer & Gmail SMTP | 2023
7 months ago
Full Stack Laravel 10 & React JS | SPA Authentication | Part 2
7 months ago
POSTS TAGS
- #PHPAuthentication
- #WebDevelopment
- #Security
- #PHPProgramming
- #OOP
- #MySQL
- #Bootstrap5
- #WebSecurity
- #AuthenticationSystem
- #ProgrammingTips
- #CodeReadability
- #UserExperience
- #PasswordSecurity
- #WebDesign
- #PDO
- #PHPWebDevelopment
- #FrontEndDevelopment
- #TechBlog
- #SoftwareDevelopment
- #ProgrammingBestPractices